 We're now one step closer to passing an MOT, having changed the front discs and pads on the eSpace.
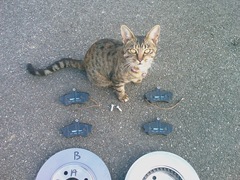
We'd been meaning to order the parts for months and with all the talk of our new breakaway 'boomerang rally' I decided enough was enough and we should get on with it. A quick search of the Internet discovered that Brake Parts Superstore (http://www.brakepartssuperstore.org.uk/) offered by far the best price and free delivery (on orders over £50). £66 and 1 day later the two discs, four brake pads (and a mystery cat?!) arrived.
So with the Haynes manual to hand we began...
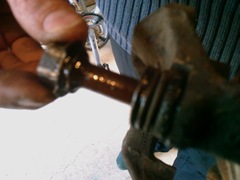
Firstly we popped over to Ross's and borrowed his trolley jack and 2x axle stands and promptly set about jacking the eSpace up and taking off the two front wheels. 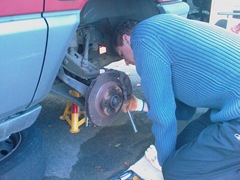 Next we needed to remove the calliper assembly, firstly the piston/cover section, then the cradle (see picture opposite). As always this wasn't quite as straight forward as it should have been! First we tried a 17mm - too small, then a 19mm - too big. It was at this point we discovered Tim's socket set doesn't have a 18mm socket! Luckily his neighbour was in and he kindly lent us his set, however his 18mm socket was too big, but his 17mm was a perfect fit - work that one out!?!
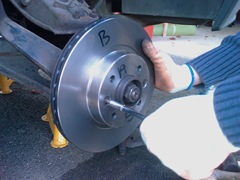
With the calliper off it was a simple exercise of removing 2 screws to get the existing disc off the hub and replacing it with a shiny new one (see opposite) which incidentally weighs an absolute tonne!
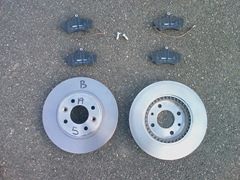
It was difficult to get a picture that did justice to the amount of wear the original discs had been subjected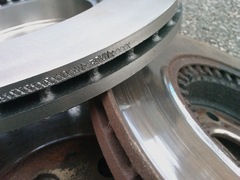 to, but if you click the image opposite and notice the raised lip on the inner and outer edges of the old disc (right). Then compare that to the new disc (left) which is completely flat! (in fact the face of the new disc is THICKER than the rim! Sadly we didn't have the necessary tool to actually measure the amount of wear the old discs had.
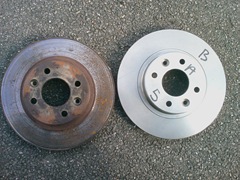
As you'll see from the picture opposite the new disc's look a lot better than the ones we replaced! Annoyingly I forgot to take a picture of the old pads but suffice to say they were pretty thin too!
With the new disc on its a very simple job of reattaching the calliper cradle 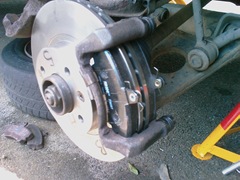 and slotting the two new brake pads into it. At this point you'd attach the brake pad 'wear sensor' wire, however on the near-side front wheel the cable was damaged :( The picture opposite shows the new disc and pads fitted (without the calliper cover/piston).
Now came the second 'issue' of the day. When we went to fit the calliper cover/piston over the top of the pads it wouldn't fit. I thought that was to be expected as the new disc and pads would be much thicker than the ones we'd replaced, so I'd expect the piston to be 'sticking out' too much. A quick moment of panic set in when we couldn't get the piston to budge, but a after consulting the 'bible' (thank you Mr Haynes!) it suggested using a G-Clamp or piece of wood. As always Tim had the correct tool to hand and within a few minutes the piston was fully retracted. Job done - or so we thought...
The calliper cover still wouldn't fit, and a bit of 'gentle' persuasion with a hammer only just managed to get it back on. Cue more panic as with the calliper back on the disc was locked tight and wouldn't move - great from the brake's point of view, poor if you're the wheel!!
So as not to get disillusioned with it I suggested we 'leave it and see what happens' and carry on with the next wheel. The next wheel was much easier (despite the 17mm bolt turning into an 18mm?!?) but the good news was the 'pad wear sensor' cable was ok (we think) on the passenger side wheel :)
The annoying news (well good really) was that this time the Calliper cover went on fine with no hammer needed. I suggested maybe starting the engine might cause the brake fluid pressure to be evened out (which didn't work). Tim then suggested I put it into first. Despite his 'trust me' plea, alarm bells immediately started ringing in my head at the thought of engaging first gear on a car with only 2 wheels (coupled with the fact I drive a rear wheel drive car). With the same sensation you get when trying to rub your stomach and pat your head at the same time I brought the clutch out and engaged first gear. As if by magic (well not really seeing as Tim knew the eSpace was front wheel drive) I didn't end up being catapulted into his garage.
On a more disappointing note the front left disc started spinning fine, however the front right didn't move (Was it able to move ok despite the other wheel being locked because of a 'slip-diff'? - answers on a postcard). So we decided it was time to get the calliper off and investigate further.
It turns out that the two bolts which hold the Calliper Piston assembly to Calliper cradle screw into another, tread-less bolt which 'floats' inside the cradle. The problem we had was that one bold was stuck rock solid. Cue gallons of WD40, a large amount of bashing, swearing, twisting, pulling and more swearing. Nothing. Didn't move a millimetre. Eventually after giving up on trying to pull it out we decided to 'smash the sh*t' out of it with a hammer and after a while... bingo it moved - albeit in the wrong direction!
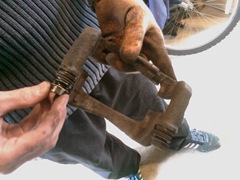
 Spurred on by a glimmer of hope Tim used what only can be described as super-human strength to get he bolt out!! We then added more WD40 into the hole and all around the bolt and within seconds the bolt was working as designed. (See above- sorry the picture didn't come out very well)
We assume some water had got into the hole at some point and had caused the bolt to rust and expand. Tim then realised that the small 'lip' on the mouth of the hole and round the head of the bolt is designed to house the springy rubber tube, making it water tight. Needless to say the tube was not making use of this design, so using a small screwdriver we got it on, hopefully preventing it ceasing up again.
We then re-fitted the calliper, both front wheels and lowered the eSpace back to solid ground.
All that was needed now was a quick test drive to check the brakes - and hey presto they worked a treat! Skid marks and everything!
Did you ever doubt us? ;)
Stay tuned for our exploits on replacing the rear brake shoes (once we mange to get the near-side rear tyre off!) and sourcing 4 new tyres.


